Home Networking Tutorials
The Home Network
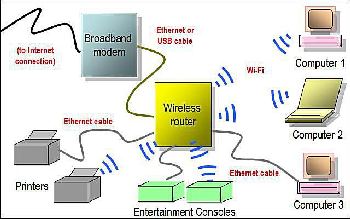 This network has both wired and wireless devices.
Almost every home now has an Internet connection and a home network to split and deliver that Internet signal. The home network allows multiple devices (desktop PCs, tablets, smartphones, etc.), to connect to the Internet, as well as to each other.
We have had a home network for years. These are the devices we currently have in our network:
- 3 desktop PCs
- 1 laptop
- 1 tablet
- 1 smart phone
- 3 smart TVs
For years we had them all working off of a modem/router combo supplied by the cable company. With that setup, we experienced periods of slow down on the desktops, as well as frequent buffering of streaming video shows. Frustrating!
We fixed those problems by rebuilding our home network around one superior piece of equipment... a "super router".
Stick with us as we share with you how we did it; you can too...
Home Networking Tutorials
This is a fairly looong page. (And boring if you are not interested in creating a great home network.
But if you would like to have a top-notch home networking system that allows streaming of multiple devices at the same time, and/or want to create an automated Smart Home, then this page is for you. Perhaps a list of page contents will be helpful:
- Network Components
- The Modem
- The Router
- The "End Devices"
- What you See is What you Got
- Home Networking FAQs
- Setting up your Home Router, Step by Step
1. Unpack
2. Sketch your network
3. Switch the wires over
4. Upload App & follow instructions
5. Change Router settings
6. Cancel ISP Wi-Fi services
7. Set up all your home Devices
8. Admire your new network - Results & Issues
Home Networking Tutorials
Network Components
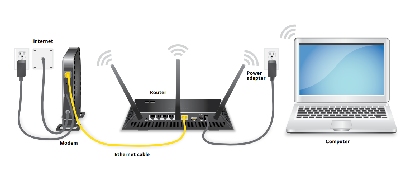 Home Networking Simplified
First of all, take a deep breath!
Building a home network can be quite an ordeal if you don't understand it. But keep things simple, learn the basics, and you'll survive your networking project with a smile on your face :)
First we'll discuss the components which make up any home network. They include a modem, a router, and the end devices, such as computers, cell phones and smart TVs.
The picture above is a simplified diagram of how these components fit together.
Home Networking Tutorials
The Modem
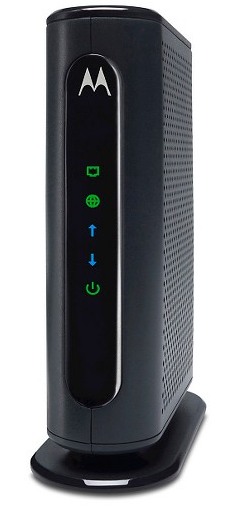 Modem can be supplied by ISP or bought outright.
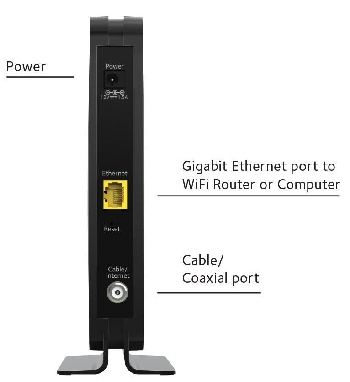 This is the back of a modem.
The modem is a box-like mechanical device which brings the Internet signal from the outside into your home. The modem is usually supplied by the Internet Service Provider (ISP), but you can purchase your own.
Coaxial Internet cable is routed through the wall or floor and hooked up to the Modem* [see Footnote].
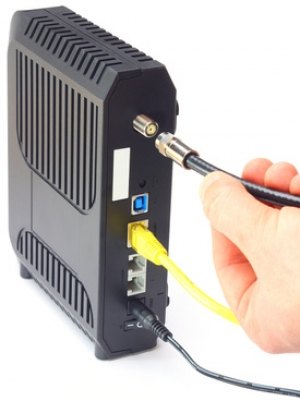 Top wire is the coax cable from outside to the modem.
Home Networking Tutorials
Where to locate the Modem?
It is usually placed close to the main cable line as well as the main telephone trunk wire. Phone lines are connected directly to the modem and do not go through the router.
Note: to get the best wireless reception throughout your home, try to place "Command Central" (Modem + Router) in a central location.
Keep these devices open to air (not hidden in a cabinet) and don't put them next to your microwave oven, cordless telephone or motorized appliances.
Home Networking Tutorials
The Router
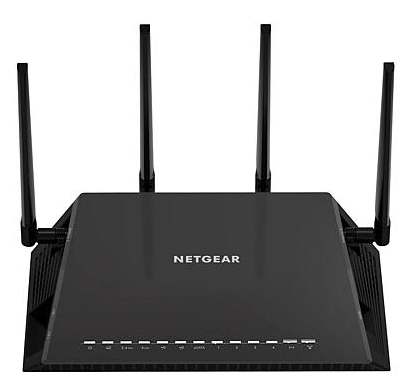 A typical router; the "heart" of the home network.
The Router (also called the "Hub") is the heart of your home networking system. Although the modem brings in the cable signal from your provider, it is the router which splits that signal up and sends them on to all of your household devices.
The router is usually placed very close to the modem, so you can connect them together with a short ethernet (Cat 5) cable.
Sometimes the cable company provides a modem/router combo unit (no separate router). In this situation, your ISP provides all services these devices normally provide, including Wi-Fi (wireless routing). And they are probably charging you a monthly fee for Wi-Fi services.
Keep with us and we'll tell you how to permanently cut that Wi-Fi fee off your cable bill.
Now then, back to standalone routers...
Some routers can only service hardwired devices like computers via ethernet cables; some only send wireless signals on to your wireless devices.
But most modern routers do both wired and wireless routing, and this is definitely the type of router we recommend for your home network.
Why would you even want to have a wired network? To learn more about advantages and disadvantages of Wireless vs. Wired Networks, click here.
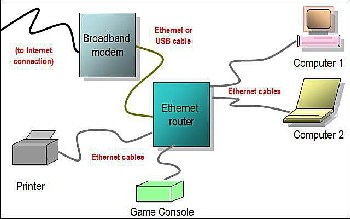 This is a completely wired network.
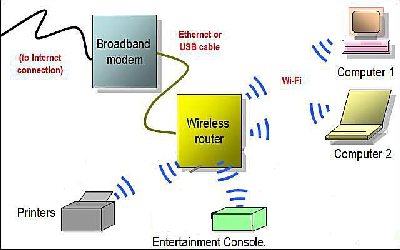 This one is wireless (Wi-fi).
Home Networking Tutorials
Router sends signals to the "End Devices".
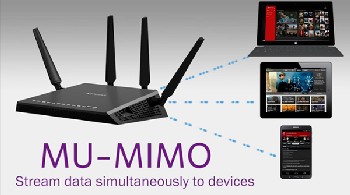
The router we have and recommend is a "smart router", capable of simultaneously streaming to multiple devices.
It sends the Internet signals both through wires (desktop computers hardwired with ethernet cable) as well as wirelessly (to wireless laptops, tablets, mobile phones).
This special device utilizes MU-MIMO technology, which is the latest and greatest element of successful home networking.
MU-MIMO stands for Multi-User, Multiple-Input, Multiple-Output.
Home Networking Tutorials
What you See is What you Got
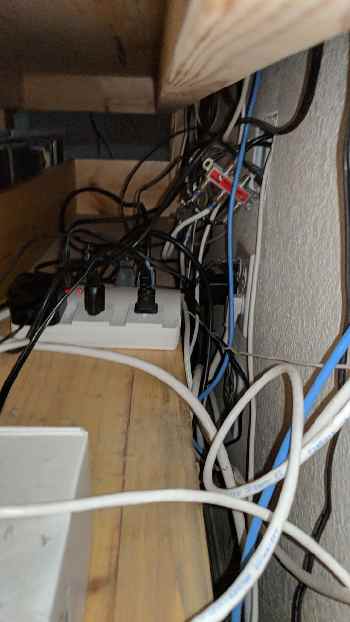
This all might sound a little complicated to you, but it's really simple. Just because it looks like this behind your modem and router doesn't mean it's truly complicated.
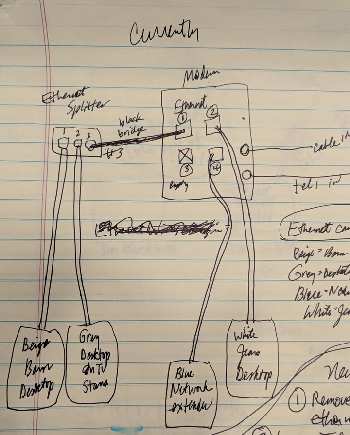 How our old network was wired.
Start out your home networking project by taking a good hard look at what you have now. Get pen and paper and start tracing each cable. Make a sketch of how things are wired to one another.
Study your diagram until you understand your existing network. This is what our diagram looked like.
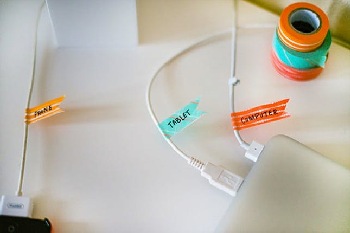
TIP: as you do this, label the end of each wire with a piece of masking tape, indicating what it is and where it goes. This will help you tremendously when you start unplugging wires to install your new router. This is how mine looked.
Next, take another peek at the diagram at the very top of this page to see again how a typical network is wired together.
Home Networking Tutorials
How will your new network be wired together?
After you puzzle that out, things will start to fall into place. Do all of this before you even unpack your new router.
My brother Randy sent me a super-duper Smart Wi-Fi Router for Christmas: the Netgear Nighthawk AC2300 (Model #R7000P). That is what started our whole home network upgrade project.
More on this essential home networking device later.
Home Networking Tutorials
Frequently Asked Questions (FAQs)
Let's pause for a moment and explore a few issues that you may be pondering at this point.
 Got a Question...
- Why would you want to hard wire a computer instead of having it on Wi-fi (wireless)?
- So how do I hard wire some of my Devices?
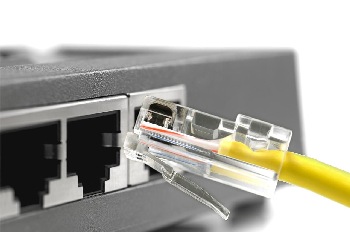 Ethernet port looks kind of like a telephone port, but it's bigger.
- Is there a way to hard wire a device that doesn't have an Ethernet port?
- Is there a way to hard wire my laptop while I am traveling away from home?
- Is there a way to turn my hardwired computer wireless?
- I've seen new Routers labeled MU-MIMO. What is that and do I need it?
- What if I use all the Ethernet ports on my router but I have more devices I want to hard wire?
Home Networking Tutorials
Setting up your Home Router
Step by Step
Even though the physical setup/wiring of your home network is fairly simple and easy to understand, we have to admit that setting up a new router can cause a headache or two!
We learned this the hard way, and present this simple router installation guide so hopefully, you won't have to go through what we did.
As each individual router has it's own particular installation process, and you might not be installing the same router we did, we do not include model specific step-by-step details.
1. UNPACK
Unpack your new router. Carefully read all the manuals and supportive documents that came with the unit. On ours, we had to screw on the antennas. After you understand the installation process thoroughly, proceed.
2. DRAW YOUR NEW NETWORK
Make a new diagram showing where each of your labeled wires is going to be plugged in.
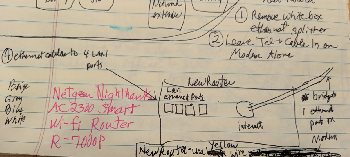 This is how we determined our new network should be wired.
The wires going to the cable company's modem:
- Telephone trunk line (no change)
- Coax cable from outside (no change)
- Jumper cable from the modem's Ethernet port #1 to the "Internet" Ethernet port on the router.
The wires plugging into the back of the new router:
- Jumper wire from the Modem to the "Internet" Ethernet port on the router.
- 3 hardwired computer lines to Ethernet ports #1-3
- Network Extender to the last Ethernet port
3. SWITCH THE WIRES OVER
First, unplug your Modem. If it has a backup battery, remove that too. Wait 90 seconds, re-install the battery and plug the Modem back in. Let the lights return to normal.
Next, connect the modem to the new router with an Ethernet cable (our router came with a new yellow Ethernet cable.) Attach it from Modem Ethernet Port #1 to "Internet In" Port on the new router.
Unplug all Ethernet cables (if any) from Modem Ethernet Ports #2-4 and plug them into the Ethernet ports on the back of the router.
Plug in the router and let the power light change to white. The Router is ready. That was the easy part...
4. UPLOAD APP & FOLLOW INSTRUCTIONS
The new Netgear AC2300 Smart Router we installed was much easier than those we have done in the past.
Now you can upload an installation app (called Netgear Up) to help guide you. Follow each step as the Netgear Up app directs.
Your router may have a different installation game plan.
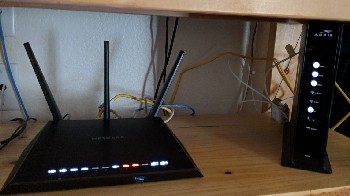 Our new Network; a clean, mean machine!
5. CHANGE ROUTER SETTINGS
After the Wi-Fi from the new router shows "connected", with your network name showing up in the "network list", it's time to make the following changes to router settings:
- Change the network name and password. For network name, use something you'll recognize, such as your last name. For password, we used our home phone number, as we'll never forget that.
It's so easy to forget these things a year from now, when a friend comes to visit and needs your Wi-Fi password so he can use his cell phone.
You can even write the new network name and password on a piece of masking tape and stick it to the bottom of your router. You don't think you'll forget this information, but you will. - Change the admin password. Although the username remains "admin" on our router, we changed the password for the administrator to the same as our Wi-Fi password, which was our phone number.
- For this particular router, we also had to enable: "Smart Connect" and "Dynamic QoS", whatever those were. App on-screen directions were easy to follow for this process.
6. CANCEL ISP WI-FI SERVICE
Call the cable company and have Wi-Fi services discontinued. They were able to do that for us right from from the office; no service call was needed.
They also warned me that only ethernet port #1 on the modem would be operational. In other words, I could not leave the hardwired computers plugged into the back of the modem; they had to be switched to the new router. No problem, that's what I had already done anyway.
Do you need to order faster Internet speed while you're at it?
Your super-fast new network can't go any faster than the speed your provider delivers. Ours is 100 mbps, which is fine for all our multiple streaming needs.
7. PROVIDE DEVICES WITH NEW NETWORK INFO
Each device on our network asked for new information before it would work. That included hardwired computers, laptops, tablets, smartphones and Smart TVs. Each one required the new Network Name & Password.
Some devices required us to get into "Network" or "Setttings" to make these changes. Even my wireless printer wanted some attention.
8. ADMIRE YOUR NEW NETWORK
Home Networking Tutorials
The Results
We immediately noticed a significant increase in speed in all of our computers. As well, streaming Netflix and Amazon Prime is much better, with no buffering whatsoever (which was a problem before).
We highly recommend this "Smart Router". Don't build your new home network without it or a similar or better router.
Home Networking Tutorials
Issues
The only "issue" we had with our installation was as follows.
I made some recommended changes to the settings, which required a "reboot" of the router. When it came back up, we couldn't get it to work! This was eventually fixed by:
Unplugging the modem and router and waiting 60 seconds.
Then plugging the modem back in, waiting 60 seconds, then let the lights return to normal.
Then plug the router back in and let all those lighs settle down. (Particularly, the 'Internet" light must be white.)
The router then worked flawlessly from then on.
The lesson here: When nothing else works, REBOOT EVERYTHING!
*Footnote: This article is focused on networking with a signal provided by a coaxial cable provider, not DSL or Satellite, which we have no experience with.
Just know that is possible to set up a Smart Home Network with a DSL Internet phone line or Internet Satellite connection.

- [Gadgets HOME] ›
- [Household Management] ›
- [Smart Home Ideas] ›
- [You Are Here (Home Networking Tutorials)]
