Outdoor Cooking Equipment

We just love barbequing and cooking outdoors, especially during the summer; keeps the house cooler. We prefer gas (propane tank) grills because the fire is instant and so easy to use.
It's nice to be able to walk out back, turn on the grill and drop a couple of thick porkchops on it. Dinner in 15-20 minutes, and no pots and pans to clean!
We also love the smoky flavor the meat picks up, even from a gas grill.
Below we explain why we recommend Weber Grills, Offset Smokers, Big Easy Turkey Fryers and Excalibur Dehydrators. Join us and also learn about our Infrared Thermometer and snag some excellent free outdoor cooking recipes.
Outdoor Cooking Equipment
Barbecue Grills

Weber Q-3200 Gas Grill
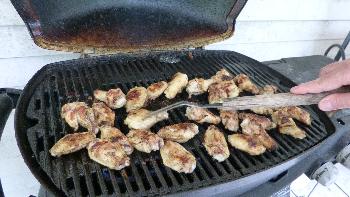
We have probably been through most of the outdoor grills on the market; including Coleman, CharBroil and Broil King. As we cannot afford "high-end" grills, most of these cheaper barbecue grills we bought rusted out or burned out within a couple years. So...
We have absolutely no probem with advising you without reservation to make your next outdoor grill a WEBER.
Gas or charcoal? We have also wrestled with the mess and excessive time required to grill with charcoal briquets, and gave up on that. And so we also say: Get a PROPANE Weber Grill.
[After a gas grill is used 3-4 times, the food debris retained in the bottom is charred to cinders, which acts like charcoal and produces the same smoky flavoring as a charcoal grill.]
Which grill? Pay a little more and get this one: The Weber Q-3200 (pictured above). You will find one at Walmart, Home Depot or on Amazon. Our Amazon affiliate link is here:
This grill has electronic ignition which actually lasts longer than 2 weeks, and two gas burners which provide either direct and indirect cooking.
The thing about a Weber, and we have no idea how they do it, the meat ends up with just the right amount of outside crispiness and inside juciness. Has something to do with their unique cooking grid.
We have never regretted buying this grill, and in fact have two: one on the back porch and one in our Pavilion (cook shack).
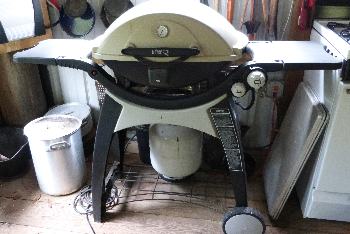 Our Pavilion Weber
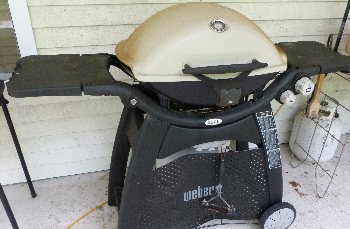 Our Back Porch Weber
Below is a brief video where we are grilling two of our favorites: Chicken Wings and N.Y. Strip Steaks:
Outdoor Cooking Equipment
Meat Smoker

Charbroil Offset Smoker
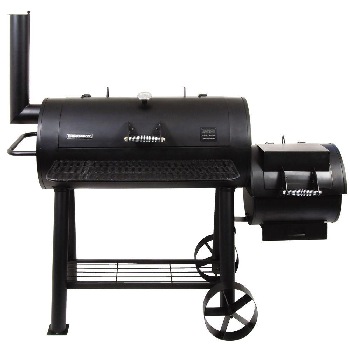
Are you familiar with Offset Smokers? You may have seen one (like in the picture to the right) and just didn't realize how they work.
Here's how: The large cylinder is the cooking chamber, where the meats are placed, and the small box to the side is the firebox, where the heat and smoke for the process are produced.
A small charcoal fire is started in the firebox, allowed to ash over, and then wood smoke flavoring chips are sprinkled onto the charcoal bricks.
The ventilation system draws heat and smoke from the firebox into the cook chamber, where it slowly cooks and flavors the meat. Lastly, the smoke exits through the exhaust vent sticking up on the side.
With this "hot smoking' technique, the meat is cooked over several hours with a combination of low heat (125 to 175°F) and penetrating smoke. It produces meats that are moist, tender, and flavorful.
But you have to babysit the smoker a little bit, to keep the temp within range. If allowed to get over 185°F, all the moisture and fat is cooked out, leaving the meat tough and stringy.
Regular stoking with small feeds of new charcoal and wood chips are made to keep it from cooling off too much.

We keep our Smoker on the covered porch of an outbuilding, where it has weathered the elements without any significant corrosion for over 7 years.
Although we also throw a chicken or small roast on the smoker grill, we bought it for and use it often to make our beloved smoked pork ribs. Scott has a Kick-Ass Smoked Rib recipe and a homemade barbecue sauce which we share with you here: Outdoor Cooking Recipes.
We use our Infrared Thermometer (below) to check the grill grate temp in the smoker before adding meat. We also use it to get our outdoor pizza oven (see below) way up to speed, like 1,000°F plus. Wow!
We also wanted to recommend some meat shredders for making pulled pork, and came across this #1 Best Seller 3-pc BBQ set, which also includes Silicone Grill Gloves and a baster:
Outdoor Cooking Equipment
Nubee Infrared Thermometer

Nubee Infrared Thermometer
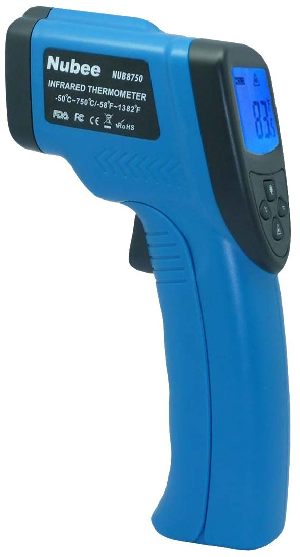
Excellent cooking tool for the price! You can use it to determine the surface temperature of any item, including the grate temperature of a smoker grill, wort temperature when brewing beer, the temp of air coming out of AC vents, or checking your ceilings for low R-value spots.
An IR thermometer only reads surface temperatures, not the internal temp of cooked meats. This picture shows me checking the cook surface of my outdoor pizza oven. The white arrow points to the little laser dot which took the reading.
And yes, it really does say 890°F- Cooks a pizza in about 90 seconds!
[Coming Soon: How we built our outdoor pizza oven.]

Outdoor Cooking Equipment
The Sad Truth About Fried Turkey
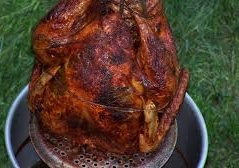
Have you ever tasted fried turkey? Once you have, you will never be satisfied with oven-baked turkey again. The tradition apparently began down south in Cajun Country and spread to mainstream America.
The thawed turkey is injected with liquid marinade/seasonings, rubbed down with dry Cajun seasoning, then carefully set into a huge cookpot filled with scalding hot peanut oil.
The result is absolutely delicious! Moist and flavorful meat and crispy skin cracklins. We fried turkeys for several years and they were always devoured, down to picking the bones.
So why did we quit doing it? Cost, mess factor and safety.
1. Cost- It's expensive to deep fry turkeys. It takes over 3 gallons of oil. At $13 a gallon, you are talking over $40 just for the oil. You can cool, strain and freeze the leftover oil, but it takes up a lot of your freezer space.
2. Mess Factor- No matter where you set up to fry, it makes a mess. When the turkey is placed in the pot and when you remove it, hot oil spills over the sides of the pot, making a sticky, oily mess. The pots are quite a chore to clean afterward, too.
3. Safety- We always set up our fryer in the open due to the heat and oily mess created. You have to be super-vigilant that children and dogs do not come near. I was always on pins and needles the whole time.
If the oil is heated too high, the grease can actually catch on fire. (Nice!) In any case, the potential is always there for disaster and/or serious burns.
Take a peek at some lovely Thanksgiving feasts gone awry:
We do still use the burner and pot from the King Kooker for big seafood boils and for boiling wort to make home-brewed beer (see below about home-brewing).
If you are still interested in frying up a turkey the traditional way despite the warnings, King Kooker leads the pack:
Outdoor Cooking Equipment
The Big Easy Air Fryer

Air Turkey Fryer- Charbroil The Big Easy
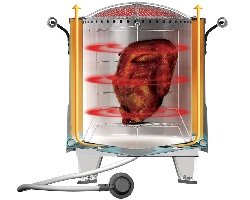
Long story short, we gave up on the hot oil fryer and found an alternative: The Char-Broil Big Easy Oil-Less Infrared Turkey Fryer.
With this outdoor cooking equipment, you can still inject the bird with marinade; but, before dusting with Cajun seasoning, you oil it up with a few tablespoons of peanut oil to help it "crisp up".
Is the Big Easy turkey as good as the deep-fried turkey? No; I would say it is about 80% as good.
Is it much cheaper, safer and cleaner than the King Kooker? Absolutely.
Note: You can only cook a turkey up to 16 lbs. in the Big Easy infrared fryer.
TIP #1: Order the Big Easy Hinged Roaster Basket (we found one cheap on eBay). This basket opens up for easy removal of the turkey. It's a bitch to get it out of the standard basket which came with it.
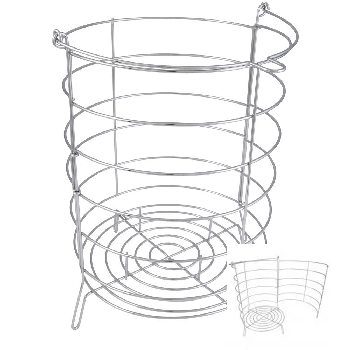
TIP #2: In the interior diagram above, it shows the turkey sitting up nice and tall in the basket, with all the heated air circulating uniformly around the bird.
In reality, the weight of a 12-16 lb. turkey causes it to "squash down" or collapse somewhat at the bottom of the basket. The result is the bottom does not get cooked thoroughly, while the top is done.
We came up with a great solution to this problem, and share it here:
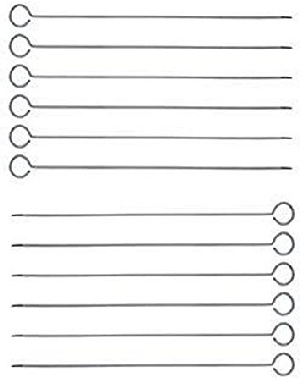
1. Get some 12" shish kebob skewers.
2. Put the prepared turkey inside the basket, breast side to the top, and lay the basket down on its side. Slide the bird up so it is at the very top of the basket. Then push skewers into the turkey, extending all the way through and with both ends of each skewer resting on the upper edge of a basket ring. Place all 6 skewers this way. This suspends the bird up off the bottom so it cooks properly.
3. After cooking is done, move the basket to a large tray, remove the skewers and carve the bird up. Bonus: Now you can make shish kabobs, too.
I know this sounds like a lot of trouble, but once you've done it a couple times, it's easy... and worth it...
Yummm!
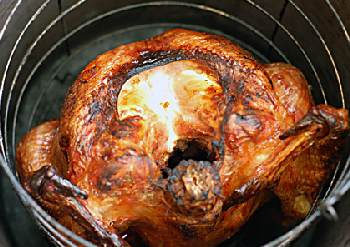
This is our recipe when we cook a Big Easy Turkey: Outdoor Cooking Equipment- Recipes.
Outdoor Cooking Equipment
Excalibur Food Dehydrator

Excalibur 9-Tray Food Dehydrator
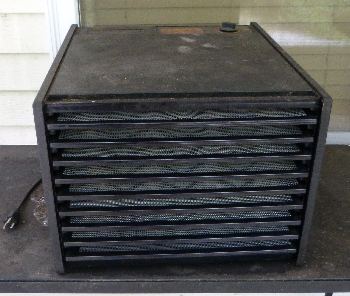 Our Excalibur Dehydrator
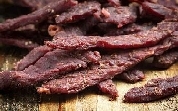
Do you like beef jerky? We love it! Our Ecalibur Food Dehydrator makes it easy and painless to produce a big bag full of fresh and fantastic jerky.
This is an upscale dehydrator, and it can be used to dry fruits, vegs, fish, herbs, etc. (see pic)
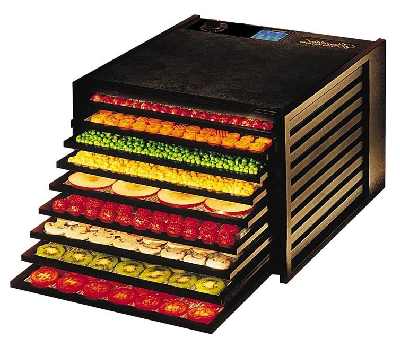
One day I'll try it out for something other than jerky, and then I'll add to this entry. :)
TIP: Run your dehydrator in a protected outside location (like a covered porch). Do not run it in the house; the appliance puts out tons of hot, moist air which will quickly make it uncomfortable (and smelly) in there.
Here is my favorite Beef Jerky Recipe: Outdoor Cooking Equipment- Recipes.
And join us for a quick video showing how easy it is to make Jerky with this outdoor cooking equipment:

 That's Mom holding the pizza peel.
Coming Soon:
Our Build It! Section where you will learn:
- How to build an Outdoor Pizza Oven
- Home Beer Brewing How-To
- Build a Treehouse
- Build a small solar power system
In the meantime, want to see some Cool Kitchen Gadgets?
